Are you looking for a creative way to organize your books and add a unique touch to your space? Making a bookshelf from crates is a simple and affordable project you can do yourself.
Imagine turning ordinary crates into a stylish, sturdy shelf that fits perfectly in your room. In this guide, you’ll discover easy steps to build your own bookshelf, even if you have little experience with tools. Keep reading, and you’ll soon have a one-of-a-kind bookshelf that shows off your style and keeps your favorite reads close at hand.

Credit: smokymountainfarmhouse.com
Choosing The Right Crates
Choosing the right crates is an important step when making a bookshelf. The crates you pick affect the look and strength of your shelf. It helps to think about the style, size, and material of the crates. This makes sure your bookshelf fits your space and holds your books well.
Types Of Crates
Wooden crates are the most popular for bookshelves. They are strong and can hold heavy books. Plastic crates are lightweight and easy to clean. They work well for a modern look. Metal crates offer a sturdy and industrial style. Each type has its own feel and durability.
Size And Shape Considerations
Crates come in different sizes and shapes. Square crates are common and stack easily. Rectangular crates give more room for tall books. Consider the space where the shelf will go. Choose crates that fit well and allow easy access to books. Think about how many books you want to store.
Material Options
Wood is warm and classic. It can be painted or stained. Plastic is simple to keep clean and lightweight. Metal is very strong but can be heavy. Pick a material that matches your room’s style. Also, consider how much weight the shelf will carry.
Planning Your Bookshelf Design
Planning your bookshelf design is the first step to a successful project. Careful thought helps create a sturdy and useful shelf. It also saves time and materials. Start by imagining how your bookshelf will look and function.
Consider the space where the bookshelf will go. Think about the size and style that fits your room. Planning well means fewer mistakes during building.
Determining Shelf Dimensions
Measure the wall or area for your bookshelf. Decide the height, width, and depth of the shelves. Keep in mind the size of books or items you want to store. A good shelf height is usually 10 to 12 inches. Depth should allow the books to fit without sticking out.
Make sure the overall size fits your space. Leave room to walk and move around. Write down all measurements before buying crates or materials.
Layout And Arrangement Ideas
Think about how to arrange the crates. You can stack them vertically or place them side by side. Try different shapes like squares, rectangles, or even a zigzag pattern. Visualize how the final bookshelf will look.
Plan for stability. Arrange crates to balance the weight evenly. Consider adding extra support if needed. Design a layout that matches your style and needs.
Tools And Materials Needed
Gather all tools before starting. Common tools include a drill, screws, screwdriver, and measuring tape. You may also need sandpaper and paint if you want a smooth finish.
Choose sturdy wooden crates. Check for cracks or weak spots. Get screws or brackets to hold crates together. Prepare a workspace with enough room to build your shelf.
Preparing The Crates
Preparing the crates is an important step before building your bookshelf. It makes sure the wood is clean and smooth. This helps the paint stick well and keeps your shelf strong. Taking time here saves problems later.
Cleaning And Sanding
Start by cleaning the crates with a damp cloth. Remove dust, dirt, and any loose wood pieces. Let the crates dry completely before sanding.
Use medium-grit sandpaper to smooth rough surfaces and edges. Sand all sides of each crate evenly. This will remove splinters and prepare the wood for painting.
Painting And Finishing
Choose a paint or finish that suits your room and style. Apply a thin coat of paint or stain with a brush. Let it dry fully before adding another coat.
Painting the crates protects the wood and gives your shelf a nice look. Use light colors for a bright space or dark for a cozy feel.
Reinforcing For Stability
Check each crate for loose joints or weak spots. Use wood glue and screws to strengthen these areas. This makes the crates safe to stack and hold books.
Add corner braces or metal brackets inside the crates if needed. These give extra support and keep the shelf steady. Strong crates mean a long-lasting bookshelf.
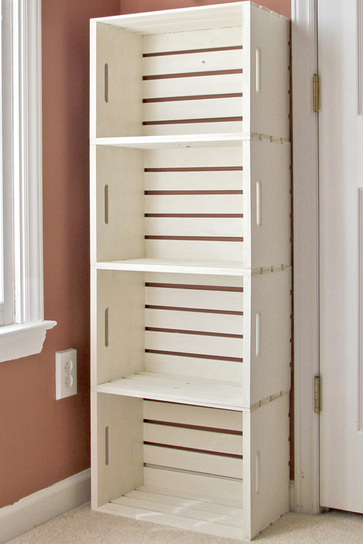
Credit: www.calmcradle.com
Assembling The Bookshelf
Assembling a bookshelf from crates is a fun and practical project. It turns simple crates into useful storage. The key is to build a strong and steady structure. This section explains how to stack and secure crates properly. It also covers using screws and brackets for extra strength. Finally, learn how to add backing for better support.
Stacking And Securing Crates
Start by arranging the crates in the shape you want. Place the crates on a flat surface for balance. Make sure the edges line up evenly. Check that the crates are stable and do not wobble. Stack them carefully, one on top of another. Use clamps or strong tape to hold crates together temporarily.
Using Screws And Brackets
Use screws to fasten the crates securely. Drill pilot holes to avoid splitting the wood. Insert screws through the sides where crates meet. Add metal brackets inside corners for extra strength. Brackets help keep the structure from shifting. Tighten all screws firmly but do not overdo it.
Adding Backing For Support
Cut a piece of thin plywood or hardboard to size. Attach it to the back of the stacked crates. Use nails or screws to fix the backing in place. This step adds rigidity and prevents crates from moving. Backing also stops books from falling out behind. Make sure the backing fits snugly and is flush with edges.
Customizing Your Storage
Customizing your bookshelf made from crates lets you create storage that fits your needs. You can change the design and add features that make it more useful and attractive. This section shows easy ways to improve your crate bookshelf.
Adding Shelves Inside Crates
Adding extra shelves inside each crate doubles your storage space. Use thin wooden boards cut to fit inside the crates. Secure them with small brackets or nails for stability. This way, you can store smaller items neatly. It also keeps your books or decorations organized and easy to find.
Incorporating Decorative Elements
Decorate your crate bookshelf to match your room style. Paint the crates in your favorite colors or use stencils for patterns. You can also add fabric liners inside crates for a soft look. Small lights or plants on top bring life to the shelf. These touches make the bookshelf a unique piece in your home.
Using Labels And Organizers
Labels help you find things quickly on your crate shelves. Attach simple tags or use chalkboard paint on crate edges. Organizers like baskets or small boxes fit inside crates to keep items tidy. This system works well for toys, craft supplies, or office materials. It keeps your space clean and items easy to access.
Maintaining Your Bookshelf
Maintaining your bookshelf made from crates is key to keeping it strong and beautiful. Regular care helps the wood last longer and keeps the structure safe. Small efforts can prevent bigger problems later.
Cleaning Tips
Dust the bookshelf often using a soft cloth. Avoid wet cloths that can harm the wood. Use a dry or slightly damp cloth for cleaning. Clear away any dirt or crumbs from inside the crates. Clean spills immediately to avoid stains.
Repairing And Touch-ups
Check the bookshelf for loose screws or nails. Tighten them to keep the structure steady. Fill small cracks or scratches with wood filler or wax sticks. Sand rough spots gently with fine sandpaper. Repaint or re-stain areas that look worn out.
Ensuring Longevity
Place the bookshelf away from direct sunlight and moisture. Keep it in a dry room to prevent wood warping. Avoid overloading shelves with heavy items. Rotate books and objects to balance the weight. Use felt pads under the bookshelf to protect floors and reduce movement.
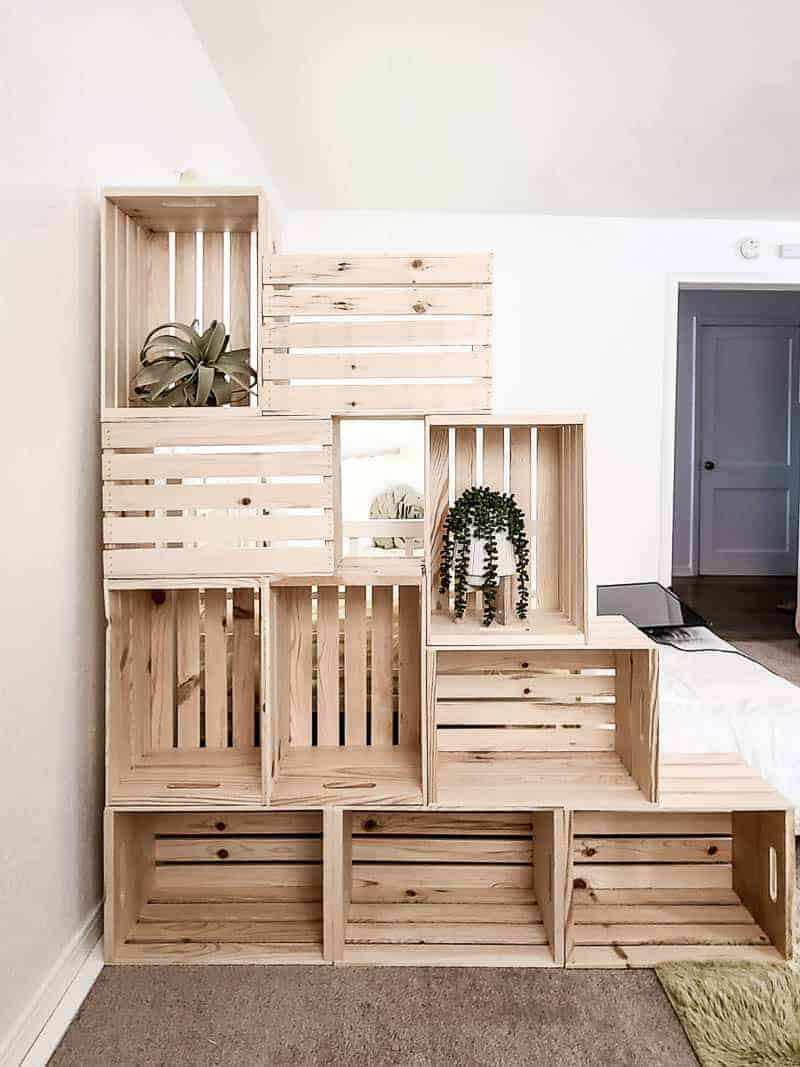
Credit: www.makingmanzanita.com
Frequently Asked Questions
What Materials Are Needed To Make A Crate Bookshelf?
You need wooden crates, screws, a drill, sandpaper, paint or stain, and wood glue. Optional tools include clamps and brackets for extra stability.
How Do I Assemble Crates Into A Sturdy Bookshelf?
Arrange crates in your desired layout, then secure them with screws and wood glue. Sand edges and reinforce corners for strength.
Can I Customize The Size Of My Crate Bookshelf?
Yes, you can stack and arrange crates to fit any space. Customize by adding paint or stain for a personalized look.
How Do I Finish A Crate Bookshelf For Durability?
Sand the crates smooth, then apply paint, stain, or sealant. This protects wood and enhances the shelf’s lifespan.
Conclusion
Building a bookshelf from crates is simple and fun. It saves money and adds style to your space. Choose sturdy crates and arrange them how you like. Secure them well for safety and durability. Paint or stain crates to match your room’s look.
This project fits any skill level and can be done quickly. Try it yourself and enjoy a unique, useful shelf. A great way to recycle and organize at once. Give your books a new home today!