
Looking for a stylish and sturdy way to organize your coats? A pipe coat rack might be exactly what you need.
It’s simple to make, affordable, and adds a cool industrial vibe to your space. Whether you want to tidy up your entryway or add extra storage to your room, this project puts you in control. Keep reading, and you’ll discover easy steps to create your own pipe coat rack that’s both functional and eye-catching.
Ready to transform your space with a DIY touch? Let’s get started!
Materials Needed
Gathering the right materials is key to building a sturdy pipe coat rack. This section breaks down everything you need. From pipes to tools, each part plays a role in your project.
List Of Pipes And Fittings
Start with black steel pipes or galvanized pipes. Choose pipes about 1/2 inch thick for strength. You will need several pipe lengths for the rack’s frame.
Include pipe fittings like elbows, tees, and flanges. These connect pipes and form hooks and support points. Flanges attach the rack to the wall securely.
Tools Required
Prepare a pipe wrench for tightening pipe connections. A drill is necessary to fix flanges to the wall. Tape measure helps ensure accurate pipe lengths.
Have a level to keep the rack straight. A pencil marks drilling points. Safety gloves protect your hands during assembly.
Additional Supplies
Use wall anchors for extra grip on drywall or plaster. Screws should fit your flanges and wall anchors well. Sandpaper smooths pipe edges for safe handling.
Consider spray paint for a custom finish. Clean cloths help wipe pipes before painting or assembly.
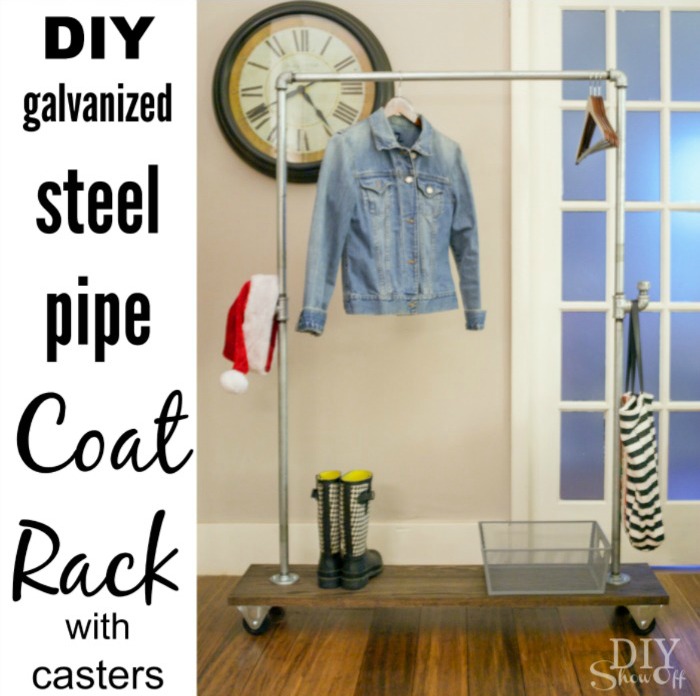
Credit: diyshowoff.com
Design Ideas
Design ideas are the first step in making a pipe coat rack. They help you create a rack that fits your space and style. Good design makes your rack useful and attractive.
Think about how the rack will look and how much space it needs. Small details affect the final look and function.
Choosing The Style
Pick a style that matches your room. Industrial style uses raw pipes and simple shapes. Rustic style adds wood for a warm feel. Modern style keeps lines clean and simple. Your choice sets the tone for the whole rack.
Determining Size And Shape
Decide the size based on your space and needs. A tall rack saves floor space. A wide rack holds more coats. Shapes can be straight, L-shaped, or freeform. Plan enough hooks for all your coats and bags.
Color And Finish Options
Choose colors to match your room’s colors. Black pipes give a strong, bold look. Silver pipes look sleek and modern. You can paint pipes with spray paint for any color. Finishes like matte or glossy change the feel. Wood parts can be stained or left natural.
Preparation Steps
Starting with proper preparation makes your pipe coat rack project smooth and fun. This step helps you avoid mistakes and saves time. You get all parts ready and organized before building.
Measuring And Cutting Pipes
Measure each pipe carefully using a tape measure. Mark the lengths clearly with a pencil. Use a pipe cutter or saw to cut pipes to size. Cut straight to ensure a good fit later. Double-check all measurements before cutting.
Cleaning And Sanding
Clean pipes with a cloth to remove dirt and dust. Use sandpaper to smooth rough edges and surfaces. This step helps paint or finish stick better. Sand all cut ends and rusty spots well. Wipe pipes again to clear sanding dust.
Organizing Components
Lay out all pipes, connectors, and screws on a flat surface. Group similar parts together for easy access. Check if you have all needed items before starting assembly. Organizing parts speeds up the building process. Keep small pieces in a container to avoid losing them.

Credit: sonucollege.com
Assembly Process
The assembly process is a key step in making your pipe coat rack sturdy and functional. This part brings all your materials together. Follow each step carefully for the best results.
Connecting Pipes And Fittings
Start by arranging the pipes and fittings on a flat surface. Match each pipe to its correct fitting. Push and twist them together firmly. The pieces should fit snugly without gaps. Take your time to ensure all connections are tight.
Securing Joints
Use pipe thread tape or sealant around threaded joints. This prevents wobbling and keeps the rack stable. Tighten the joints with a wrench for a strong hold. Check each joint for movement. Secure any loose parts before moving on.
Attaching Mounting Hardware
Locate the spots on the rack for mounting. Attach brackets or hooks to these points. Use screws and anchors suitable for your wall type. Drill holes carefully to avoid damage. Finally, mount the rack securely and test its strength by hanging a coat.
Finishing Touches
The finishing touches make your pipe coat rack both stylish and practical. These final steps protect the rack and prepare it for everyday use. Small details can improve its look and strength. Follow these tips to complete your project with care.
Painting And Sealing
Start by painting the pipes and wood to match your room. Use spray paint for smooth, even coverage. Choose rust-resistant paint for metal parts. After painting, apply a clear sealant. This layer protects against scratches and moisture. Let everything dry completely before moving on.
Adding Hooks Or Hangers
Select strong hooks that fit your rack style. Screw them securely into the wood or pipe joints. Space hooks evenly for balanced use. Choose hooks with rounded ends to avoid damage to clothes. Test their strength by hanging a heavy coat.
Wall Mounting Tips
Pick a sturdy wall for mounting your rack. Use a stud finder to locate wall studs. Secure the rack with heavy-duty screws or anchors. Check the rack’s level before tightening screws. Make sure it holds firm against gentle pulls. This prevents accidents and keeps your coats safe.

Credit: www.youtube.com
Maintenance Tips
Maintaining your pipe coat rack ensures it stays strong and looks great. Regular care keeps it safe and extends its life. Follow these simple tips to keep your rack in top shape.
Cleaning Advice
Dust the rack often using a soft cloth. Wipe down the pipes with a damp cloth to remove dirt. Avoid harsh chemicals that can damage the metal. Dry the rack well after cleaning to stop rust from forming.
Checking Stability
Check the rack’s joints and screws every few months. Tighten any loose parts to keep it steady. Push gently on the rack to test its strength. If it wobbles, find and fix the weak points quickly.
Repairing Damages
Look for rust spots or scratches on the pipes. Lightly sand rust areas and paint them with metal paint. Replace broken hooks or fittings with similar parts. Fix damage early to avoid bigger problems later.
Creative Variations
Creative variations make pipe coat racks unique and personal. They bring style and function together. You can change materials, shapes, and sizes to fit your taste. These ideas help you design a rack that stands out and suits your space perfectly.
Incorporating Wood Elements
Wood adds warmth and texture to a pipe coat rack. Use a wooden base or shelves for contrast. Choose smooth, polished wood for a clean look. Rough, reclaimed wood gives a rustic touch. Combine wood with metal pipes for a balanced design. This mix creates a cozy and stylish rack.
Using Different Pipe Materials
Pipes come in many materials, not just black steel. Copper pipes add a shiny, elegant feel. Galvanized pipes offer a lighter, industrial look. Brass pipes bring vintage charm to your rack. Mixing pipe types can create interesting patterns and colors. Experiment with finishes to find what suits your room best.
Customizing For Different Spaces
Adjust the rack size to fit your wall or corner. Small spaces need compact, vertical designs. Larger areas can hold wide, multi-level racks. Add hooks, shelves, or baskets for extra storage. Place racks near doors, bedrooms, or hallways. Tailor the rack’s shape and function to your room’s needs.
Frequently Asked Questions
What Materials Do I Need For A Pipe Coat Rack?
You need metal pipes, flanges, elbows, screws, and a wooden board. Optional items include wall anchors and paint for finishing touches.
How Do I Assemble A Pipe Coat Rack?
Attach flanges to the wooden board, connect pipes using elbows, and secure hooks. Mount the rack on the wall using screws and anchors.
Can I Customize The Size Of My Pipe Coat Rack?
Yes, you can adjust the pipe lengths and number of hooks. Customize based on your space and coat storage needs.
Is A Pipe Coat Rack Durable And Sturdy?
Yes, metal pipes offer strong support for heavy coats. Proper installation ensures stability and long-lasting use.
Conclusion
Building a pipe coat rack is simple and fun. You need just a few tools and materials. Follow the steps carefully for best results. This project adds style and function to any room. You can customize it to fit your space and taste.
Try painting or staining the pipes for a unique look. Enjoy your new coat rack and the space it saves. Keep it sturdy and clean for long-lasting use. Crafting something yourself brings pride and joy. Give it a try and see the difference!