Are you looking for a fun and creative project that brings joy to your child’s playtime? Making a wooden doll bunk bed is easier than you think, and it’s a fantastic way to add a personal touch to your child’s favorite toys.
Imagine the smile on your child’s face when they see a sturdy, handmade bunk bed just for their dolls. In this guide, you’ll discover simple steps and helpful tips to build a beautiful wooden doll bunk bed that lasts. Ready to turn some wood into a special piece your child will love?
Let’s get started!
Materials And Tools Needed
Building a wooden doll bunk bed needs the right materials and tools. Choosing good wood and having the right tools makes the project easier. This section covers the basics you need before starting.
Choosing The Right Wood
Pick wood that is smooth and easy to cut. Pine is a good choice. It is soft and light but still strong. Avoid wood with many knots or cracks. That wood can break or splinter.
Look for wood pieces that are straight and flat. This helps the bed parts fit well. Measure the wood thickness to make sure it suits your design. Thin wood may not hold weight well.
Essential Tools For The Project
Have a saw to cut the wood pieces. A handsaw or small electric saw works fine. Sandpaper or a sanding block smooths rough edges. This keeps the bed safe for dolls.
Use a drill to make holes for screws. A screwdriver or drill driver is needed to fasten parts. Clamps hold pieces steady while you work. A ruler and pencil help with accurate measurements.
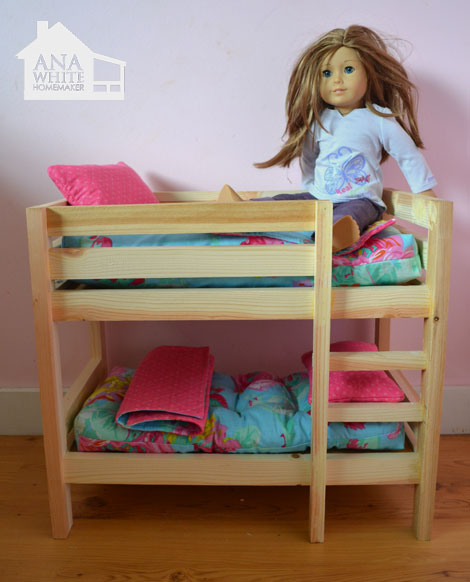
Credit: www.ana-white.com
Designing The Bunk Bed
Designing the bunk bed is the first step in making a wooden doll bed. This stage sets the foundation for your project. Careful planning helps ensure the bed is safe and fits the dolls perfectly. You will create a clear plan before cutting any wood. This reduces mistakes and saves materials.
Think about the size, shape, and style of the bed. A good design balances beauty and strength. It should be simple enough to build but sturdy enough for play. Take your time in this phase to make the best decisions.
Measuring For Doll Size
Start by measuring your dolls. Measure their length and width while lying down. Add a little extra space for comfort. This ensures the doll fits well on the bed. Write down these measurements clearly.
Check the height of the dolls too. This helps decide the space between the bunk levels. Make sure there is enough room for the dolls to sit or lie down easily. Accurate measurements lead to a better bed design.
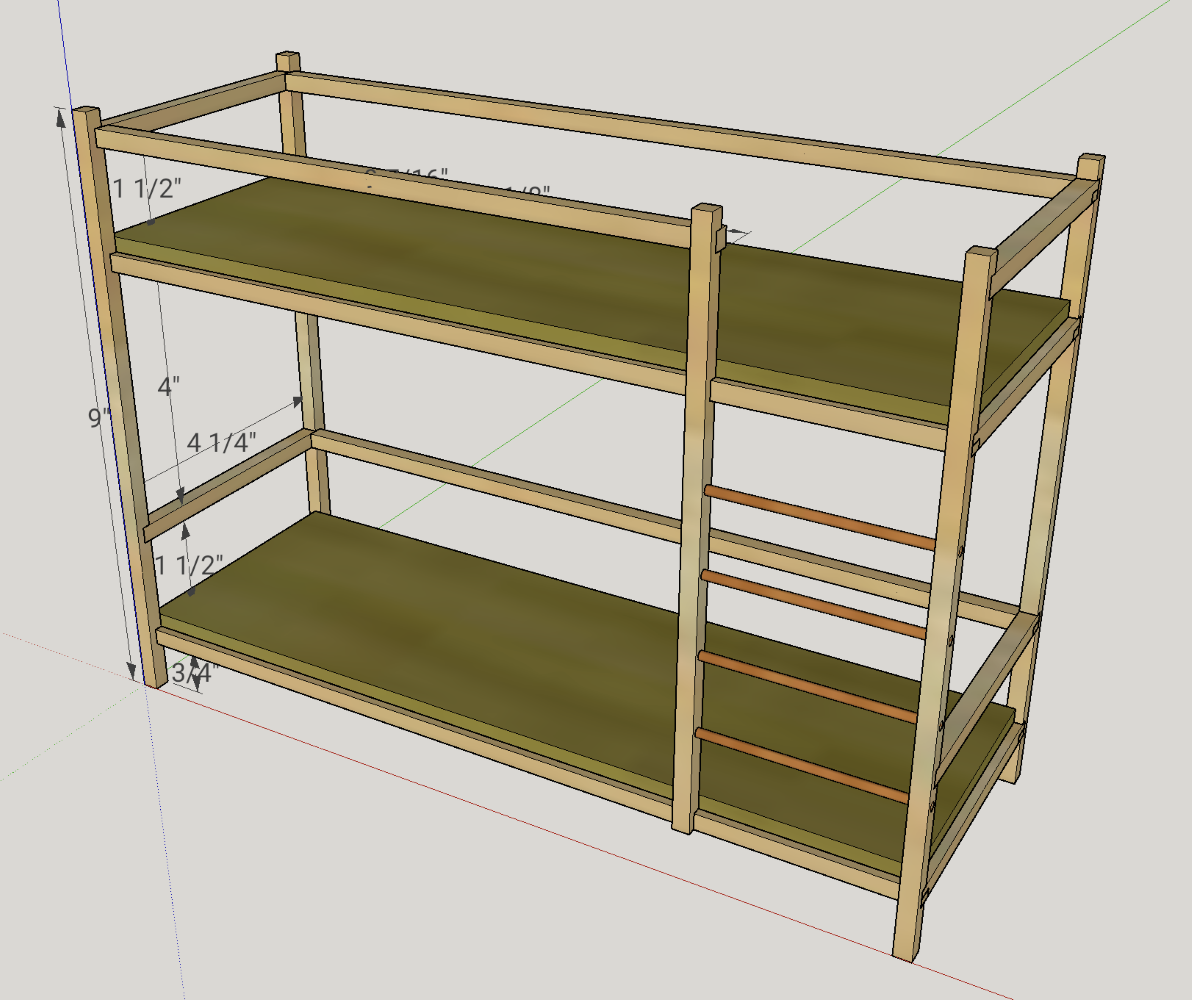
Sketching The Bed Frame
Draw a simple sketch of the bed frame. Use your measurements to create the shape. Show the top and bottom bunks clearly. Mark where the supports and ladders will go.
Keep the lines clean and easy to follow. Label each part with its size. This sketch acts as your building guide. It helps visualize the final product and plan the materials needed.
Cutting The Wood Pieces
Cutting the wood pieces is the first step to building your wooden doll bunk bed. Precise cuts ensure the bed fits together well. Use the right tools and measure carefully. Take your time to get each piece just right. This will make assembly easier and the bed stronger.
Safety Tips For Cutting
Always wear safety glasses to protect your eyes. Use ear protection if your tools are loud. Keep your hands away from the saw blade. Work on a stable surface to avoid slips. Check that your tools are sharp and in good condition. Follow the instructions for each tool carefully. Never rush the cutting process. Stay focused and take breaks if needed.
Cutting Side Rails And Slats
Start by measuring the side rails according to your plan. Mark the wood clearly with a pencil. Use a saw to cut along the marked lines. Keep the cut straight and steady for a good fit. Next, measure and cut the slats, which support the mattress. Make sure all slats are the same length. Smooth any rough edges with sandpaper. Check each piece against your measurements before moving on.
Assembling The Frame
Assembling the frame is a key step in building a wooden doll bunk bed. This part creates the strong base and sides that hold the whole bed together. Take your time to make sure all pieces fit well and are stable. A solid frame means the bunk bed will last longer and be safe for play.
Joining The Base And Sides
Start by placing the base flat on your workspace. Align the side panels with the edges of the base. Use wood glue along the contact points for extra strength. Then, fasten the sides using screws or small nails. Check that the sides stand straight and are not wobbly. Tighten all fasteners firmly but avoid splitting the wood. This step forms the main shape of your bunk bed.
Securing The Slats
Next, lay the slats evenly across the base frame. These slats support the doll mattress and keep it from falling through. Space the slats about one inch apart for good support. Attach each slat with screws or nails at both ends. Make sure the slats are flush with the sides and base. A well-secured set of slats adds durability and safety to the bed. Double-check all slats are firmly fixed before moving on.
Adding The Ladder And Rails
Adding the ladder and rails is an important step in making a wooden doll bunk bed. These parts help the doll climb safely and prevent falls. They also make the bed look complete and realistic. The ladder and rails need to be the right size for dolls and strong enough to hold small weight. Follow simple steps to build and attach these pieces with care.
Building A Doll-sized Ladder
Start by cutting four thin wooden sticks for the ladder sides. Cut several shorter sticks for the steps. Make sure the steps are evenly spaced and wide enough for small doll feet. Sand all pieces smooth to avoid splinters. Use wood glue to attach the steps between the two side sticks. Hold the ladder in place with clamps or tape until the glue dries. Check that the ladder is sturdy and straight before moving on.
Attaching Safety Rails
Safety rails keep dolls from falling off the top bunk. Cut long, thin wooden strips that fit the bed’s length. Sand the edges smooth for safety. Attach the rails to the top bunk frame using wood glue and small nails or screws. Place the rails high enough to protect the doll but low enough to see inside the bed. Check the rails are secure and strong enough to hold small pressure. Let the glue dry completely before using the bed.
Credit: blog.mcfisch.com
Sanding And Finishing
Sanding and finishing are important steps in making a wooden doll bunk bed. They help make the bed safe and look nice. Sanding smooths the wood, removing rough spots and splinters. Finishing protects the wood and adds color or shine. These steps make the bunk bed comfortable for dolls and long-lasting.
Smoothing Rough Edges
Start by sanding all wooden parts with medium-grit sandpaper. This removes large bumps and splinters. Next, use fine-grit sandpaper for a smooth surface. Pay close attention to corners and edges. Smooth edges prevent injuries and make the bed look neat. Wipe the dust off with a clean cloth before moving to the next step.
Painting And Decorating Ideas
Choose non-toxic paint safe for children’s toys. Apply a thin, even coat with a small brush. Let the paint dry fully before adding another layer. Use bright colors or soft pastels to match the doll’s room. Add simple patterns like stripes or polka dots for extra charm. You can also use stickers or small decals to decorate. Finish with a clear sealant to protect the paint and wood.
Safety Checks And Final Touches
Before finishing your wooden doll bunk bed, perform safety checks. This step protects your child’s playtime and your craft. Small errors can cause big problems later. Make sure every part fits well and feels strong. Check edges and surfaces for smoothness. Safety ensures fun without worry.
Ensuring Stability
Test the bed’s balance by gently shaking it. Tighten any loose screws or nails. Use wood glue for extra hold on joints. Check that the ladder is secure and steady. Make sure there are no sharp points or splinters. Stability keeps the bed safe during play.
Adding Bedding And Accessories
Choose soft, clean bedding that fits the beds perfectly. Pillows and blankets make the bed cozy and inviting. Add small accessories like miniature dolls or stuffed toys. These extras bring life to the doll bed. Keep accessories light to avoid tipping the bed. Simple touches make the doll bunk bed special.

Credit: www.woolyyarn.com
Frequently Asked Questions
What Materials Are Needed For A Wooden Doll Bunk Bed?
You need wood planks, screws, nails, wood glue, sandpaper, paint, and brushes. Choose smooth, sturdy wood for safety and durability. Basic tools like a saw, drill, and screwdriver are essential for assembly.
How Long Does It Take To Build A Doll Bunk Bed?
Building a wooden doll bunk bed typically takes 3 to 5 hours. Time varies based on skill level, tools, and drying time for paint or glue.
Is It Safe For Children’s Dolls To Use A Wooden Bunk Bed?
Yes, a wooden doll bunk bed is safe if properly sanded and assembled. Avoid sharp edges and use non-toxic paint to ensure child safety.
Can I Customize The Wooden Doll Bunk Bed Design?
Absolutely! You can customize size, color, and details like ladders or bedding. Personalizing makes the bed unique and perfect for your dolls.
Conclusion
Building a wooden doll bunk bed is a fun and rewarding project. You can create a sturdy, cute bed with basic tools and materials. Take your time and follow each step carefully. Personalize the bed with paint or decorations to make it special.
This project improves your skills and gives your dolls a cozy home. Enjoy the process and share your creation with friends or family. Crafting something by hand always feels good and brings joy. Keep practicing, and your projects will get even better.