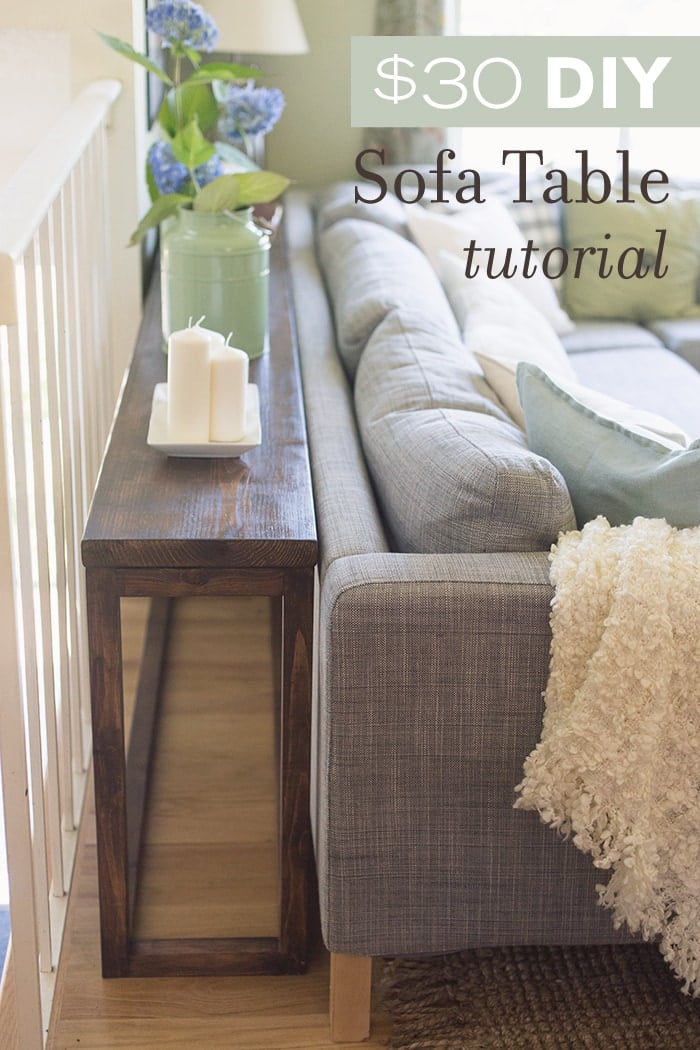
Are you looking for a stylish way to add personality to your hallway or living room? Making your own console table is easier than you think, and it gives you full control over the design.
Imagine having a piece that fits perfectly in your space and matches your style—without spending a fortune. In this guide, you’ll discover simple steps to create a beautiful console table from scratch. By the end, you’ll feel confident and ready to build a piece that’s truly yours.
Keep reading, and let’s get started on your DIY project!

Credit: farmhouseishblog.com
Choosing The Right Materials
Choosing the right materials is the first step to building a strong and beautiful console table. Good materials make your project last longer and look better. This section helps you find the best wood, finish, and tools for your table. Simple choices lead to great results.
Selecting Wood Types
Wood is the heart of your console table. Choose wood that fits your style and budget. Pine is soft, easy to work with, and affordable. Oak is harder and lasts longer. Walnut offers a rich, dark color but costs more. Think about how the wood will look and hold up over time.
Picking The Finish
The finish protects your wood and adds shine. Use varnish for a glossy look that resists water. Stain changes the wood color but keeps its texture. Paint hides the wood grain but allows many color choices. Pick a finish that matches your room and care needs.
Gathering Tools And Supplies
Good tools make building easier and safer. Basic tools include a saw, drill, screwdriver, and sandpaper. Clamps help hold pieces while you work. Get wood glue and screws to join parts firmly. Having the right tools saves time and keeps your project neat.
Credit: www.jennasuedesign.com
Designing Your Console Table
Designing your own console table is a fun and creative process. It lets you build a piece that fits your space perfectly. Think about how it will look and work in your home.
Start by planning the size, shape, and storage options. This will help you build a table you love and use every day.
Deciding On Size And Shape
Measure the wall or space where the table will go. Choose a size that fits well but does not crowd the room. Pick a shape that matches your style and space. A narrow table works well in tight spots. Wider tables add more surface area for decorations or storage.
Sketching Your Plan
Draw a simple sketch of your console table idea. Include the height, width, and depth. Sketch the legs and tabletop shape. This visual helps you see the design clearly. It also guides you during the building process. Keep the sketch easy to follow and update it as needed.
Considering Storage Options
Think about what you want to store or display. Add shelves or drawers for extra storage. Open shelves keep items visible and easy to reach. Drawers hide clutter and small items. Choose storage that fits your needs and style. This makes your console table both pretty and practical.
Cutting And Preparing Wood
Cutting and preparing wood is a crucial step in making your own console table. It sets the foundation for a sturdy and beautiful piece of furniture. Properly cut wood fits well and looks professional. Careful preparation ensures smooth surfaces that are safe to handle and finish. Follow these simple steps to get started.
Measuring And Marking
Measure twice to avoid mistakes. Use a tape measure and mark your wood clearly. Draw straight lines with a pencil or chalk. Mark all pieces before cutting to stay organized. Accuracy here saves time and materials later.
Safe Cutting Techniques
Use the right saw for your wood type and size. Keep your hands away from the blade. Cut slowly and steadily for clean edges. Wear safety glasses to protect your eyes. Secure the wood with clamps to prevent movement during cutting.
Sanding For Smooth Edges
Sand the cut edges to remove splinters and rough spots. Use medium-grit sandpaper first, then fine-grit for a smooth finish. Sand along the grain to avoid scratches. Check all edges by touch to ensure softness. Proper sanding makes your console table safe and attractive.
Assembling The Table Frame
Assembling the table frame is a key step in making your own console table. This part gives the table its shape and strength. Careful assembly ensures your table will be sturdy and last a long time. Follow each step closely for best results.
Joining Legs And Supports
Start by attaching the legs to the side supports. Use clamps to hold the pieces in place. Make sure the legs are straight and aligned. This will keep the table balanced and strong.
Using Screws And Glue
Apply wood glue to the joints for extra strength. Then, drive screws into the pre-drilled holes. The glue holds the wood tight, while screws keep it secure. Use screws long enough to hold but not split the wood.
Checking For Stability
Once assembled, place the frame on a flat surface. Press on different parts to test for wobbling. Tighten screws if the frame feels loose. The table should stand firm without rocking.
Adding The Tabletop
Adding the tabletop is a key step in building your console table. This part gives the table its final look and function. You need to fit the surface firmly and evenly on the base. This ensures the table feels strong and looks good.
Attaching The Surface
Start by placing the tabletop on the frame carefully. Align it so the edges match the base. Check that the tabletop sits flat without gaps. Use clamps to hold the surface in place if needed. This keeps the top steady during the next steps.
Securing With Fasteners
Use screws or bolts to fix the tabletop to the frame. Choose fasteners that suit your materials. Drill pilot holes to avoid wood splitting. Tighten screws evenly but do not over-tighten. This keeps the table stable and prevents damage.
Ensuring Levelness
Check the tabletop with a spirit level. Move the table to a flat surface for accurate measuring. Adjust the fasteners or add shims to fix any tilt. A level surface makes the table safe and easy to use.
Finishing Touches
Finishing touches bring your console table to life. They protect the wood and improve its look. This step lets you add your style and personality. Take time here to get the best results.
Applying Paint Or Stain
Choose paint for bold colors or stain for a natural look. Use a brush or cloth to spread evenly. Apply thin coats to avoid drips and blotches. Let each coat dry fully before adding the next. This makes the surface smooth and vibrant.
Adding Protective Coating
Protective coating guards your table from scratches and water. Polyurethane is a popular choice for durability. Apply it with a clean brush in light layers. Allow proper drying time between coats. This step keeps your table looking new longer.
Decorative Details
Decorative touches make your table unique. Add trim, stencils, or metal hardware for flair. Use simple designs that match your room’s style. Small details create a polished and stylish finish. Personalize the table to fit your taste perfectly.
Tips For Maintenance
Keeping your console table in great shape takes simple care steps. Proper maintenance protects the wood and finish. It keeps the table looking fresh and new for years. Small daily habits can prevent damage and wear. Follow these easy tips to maintain your console table’s beauty and strength.
Cleaning Recommendations
Dust your console table often using a soft cloth. Avoid rough materials that can scratch the surface. Clean spills quickly with a damp cloth to stop stains. Use mild soap and water for sticky spots. Never use harsh chemicals or abrasive cleaners. Dry the table fully after cleaning to prevent water marks.
Handling Wear And Tear
Place coasters under drinks to avoid rings and stains. Use felt pads under decorative items to prevent scratches. Move the table carefully to avoid loosening joints. Tighten screws or bolts if parts feel loose. Avoid placing heavy items that can bend or damage the table. Regular checks help catch small problems early.
Periodic Re-finishing
Sand the table lightly every few years to smooth rough spots. Apply a fresh coat of finish to protect the wood. Choose a finish that matches your table’s original look. Follow the product instructions carefully for best results. Re-finishing restores shine and adds a protective layer. It keeps your console table looking like new longer.

Credit: graceoaksdesigns.com
Frequently Asked Questions
What Materials Do I Need To Make A Console Table?
You need wood, screws, wood glue, sandpaper, paint or stain, and tools like a saw and drill. Choose durable wood like pine or oak for lasting quality. These materials ensure your console table is sturdy and looks professional.
How Long Does It Take To Build A Console Table?
Building a console table usually takes 4 to 6 hours. This depends on your skill level and design complexity. Proper preparation and following instructions closely can speed up the process. Allow extra time for drying paint or stain.
Can I Customize The Size Of My Console Table?
Yes, you can customize the size to fit your space perfectly. Measure your desired length, width, and height before starting. Adjust the wood pieces accordingly. Customizing helps your table blend well with your home decor.
What Finish Options Work Best For Console Tables?
Popular finishes include paint, wood stain, and clear varnish. Paint offers color variety, while stain highlights natural wood grain. Clear varnish adds protection without changing the wood’s appearance. Choose a finish that matches your room style and use.
Conclusion
Making your own console table is a fun and rewarding project. You can choose the size and style that fits your space perfectly. Using simple tools and materials keeps the process easy and affordable. Each step builds your skills and confidence in woodworking.
Your handmade table will add a personal touch to your home. Try this project to enjoy creativity and practical results. You’ll feel proud every time you see your finished piece. Ready to start? Gather your tools and make a beautiful console table today.