Are you looking to make the most of your room space without buying a new bed? Converting your bunk bed into a loft bed could be the perfect solution.
It’s a simple change that can open up your room, giving you more floor space for work, play, or storage. In this guide, you’ll discover easy steps to transform your bunk bed into a stylish and functional loft bed. By the end, you’ll have a fresh setup that suits your needs and makes your room feel bigger and brighter.
Ready to get started? Let’s dive in!
Benefits Of Loft Beds
Loft beds offer a smart way to use space in small rooms. They raise the bed off the floor, freeing up the area underneath. This extra space can serve many purposes. Many families choose loft beds to make a room feel bigger and more useful.
Maximizing Room Space
Loft beds lift the sleeping area above the ground. This change opens up floor space below. You can use this space for play, study, or storage. It helps keep the room tidy and less crowded. Small rooms feel larger with a loft bed.
Creating Functional Areas
Under a loft bed, you can set up a desk or reading nook. It creates a private spot for work or hobbies. You can also add shelves or drawers for extra storage. This setup makes a small room more organized. It gives your child a cozy, personal space.

Credit: ikeahackers.net
Tools And Materials Needed
Converting a bunk bed to a loft bed requires specific tools and materials. Having the right items makes the project safer and easier. Prepare everything before starting to avoid interruptions.
Essential Tools
You will need a drill with drill bits for screws and holes. A screwdriver helps tighten or loosen screws. Use a tape measure to get exact measurements. A wrench or socket set helps with bolts and nuts. A level ensures the bed stays even and balanced. Sandpaper smooths rough edges for safety. A hammer can be useful for small adjustments or nails.
Required Materials
Wooden planks or panels are needed for the loft bed frame. Use strong screws and bolts to hold parts together. Metal brackets add extra support and stability. Safety rails prevent falls from the loft bed. Paint or wood finish protects the wood and improves look. Optional: wood glue for stronger joints. Choose sturdy materials to ensure the bed is safe and long-lasting.
Preparing Your Bunk Bed
Preparing your bunk bed is the first important step in changing it into a loft bed. This process makes sure the bed is safe and ready for use. Take your time to do these tasks carefully. A good start leads to a strong and secure loft bed.
Start by clearing the area around the bed. This gives you space to work and helps avoid accidents. Keep all tools and parts organized. Preparation is key to a smooth conversion.
Disassembling The Lower Bunk
Remove the mattress and bedding from the lower bunk first. Keep them aside in a clean place. Next, check the bed frame parts that hold the lower bunk. Use the right tools to unscrew these parts.
Take out the lower bunk frame carefully. Avoid dropping or damaging any pieces. Keep all screws and bolts in a container. This helps you find them easily if needed later.
Inspecting For Safety
After removing the lower bunk, check the remaining frame. Look for cracks, loose screws, or weak joints. Tighten any loose bolts you find.
Examine the ladder and guardrails too. They must be strong and secure for safety. Replace any broken or worn parts before using the loft bed.
Safety is the top priority. A well-prepared bed keeps everyone safe and comfortable.
Modifying The Frame
Modifying the frame is the key step in turning a bunk bed into a loft bed. This process involves removing parts of the bed and making sure the remaining structure is strong and safe. Careful work here guarantees a sturdy loft bed that lasts.
Removing The Bottom Bed Structure
Start by clearing the space under the top bed. Remove the mattress and slats from the bottom bunk. Unscrew or unbolt the frame pieces holding the lower bed. Keep hardware handy in case you need it later. Take care not to damage the vertical supports. These will hold the loft bed securely.
Reinforcing The Frame
After removing the lower bed, check the frame for stability. Tighten all bolts and screws on the vertical supports. Add extra brackets or metal braces if needed. This adds strength to the frame and prevents wobbling. Use a level to ensure the frame stands straight. Reinforcing the frame keeps the loft bed safe for everyday use.
Installing Support Features
Installing support features is a key step to convert a bunk bed into a loft bed. These features ensure safety and stability. They help prevent falls and make the bed secure to use. Focus on adding guardrails and securing the ladder. Both parts must be strong and well fixed.
Adding Guardrails
Guardrails keep the sleeper safe on the bed. Attach them along the sides of the loft bed. Use sturdy wood or metal for the rails. The guardrails should be high enough to stop any accidental falls. Secure each rail tightly with screws. Check for any gaps where a child’s head or limbs could get stuck.
Securing The Ladder
The ladder must be stable and safe to climb. Fix the ladder firmly to the bed frame. Use bolts or heavy-duty screws for a strong hold. Make sure the ladder angle is comfortable to climb. Test the ladder by applying weight before using the bed. Tighten any loose parts to avoid accidents.
Finishing Touches
Finishing touches make your loft bed look complete and stylish. These small steps improve safety and add personality. Focus on smooth surfaces and extra features for better use and comfort.
Sanding And Painting
Sanding removes rough spots and splinters. Use fine-grit sandpaper for a smooth finish. Clean dust before painting to help paint stick well. Choose paint that is safe for children. Bright colors can brighten the room. Paint evenly for a clean look. Let paint dry fully before use.
Adding Storage Solutions
Storage keeps the room tidy and organized. Add shelves under the loft bed for books or toys. Use hooks for hanging bags or clothes. Drawers on wheels fit well under the bed. Storage boxes also help keep things neat. Plan storage to save space and keep things easy to reach.
Safety Tips
Converting a bunk bed to a loft bed changes its structure. Safety becomes very important. Follow these safety tips to make sure the bed is secure and safe for use. Proper care helps prevent accidents and keeps the bed strong over time.
Weight Limits
Check the bed’s weight limit before making changes. Every bed has a maximum weight it can hold safely. Do not exceed this limit. Consider the weight of the mattress and the person using the bed. Staying within the limit avoids damage and accidents.
Regular Maintenance
Inspect the bed regularly for loose screws or cracks. Tighten bolts and screws often. Look for signs of wear on the wood or metal. Fix any problems right away. Regular maintenance keeps the loft bed sturdy and safe to use.

Credit: cratedesignsfurniture.com
Creative Space-saving Ideas
Creative space-saving ideas make converting a bunk bed to a loft bed very practical. A loft bed frees up floor space and opens many new options. Small rooms can feel larger and more organized. The key is using the space below the loft bed well. This area can become a study zone, play corner, or storage spot.
Using The Space Below
The area under the loft bed offers great potential. Use it for a desk and chair to create a mini workspace. Kids can do homework or crafts there. Add shelves or drawers for books and toys. This keeps the room tidy and items easy to reach.
Another idea is to place a cozy reading nook or small sofa. Cushions and soft lighting make it inviting. It becomes a special spot for relaxing or chatting. Storage bins or boxes fit well under the bed too. This hides clutter and uses space smartly.
Decorating Your Loft Bed
Decorating a loft bed makes it feel personal and fun. Choose bright colors or themes your child likes. Add fairy lights or string lights for a warm glow. Curtains around the loft bed add privacy and style. They also create a cool hideaway effect.
Use wall decals or posters near the bed to add character. Soft bedding and pillows increase comfort and appeal. A small rug below the loft bed ties the space together. These touches make the loft bed area cozy and inviting.
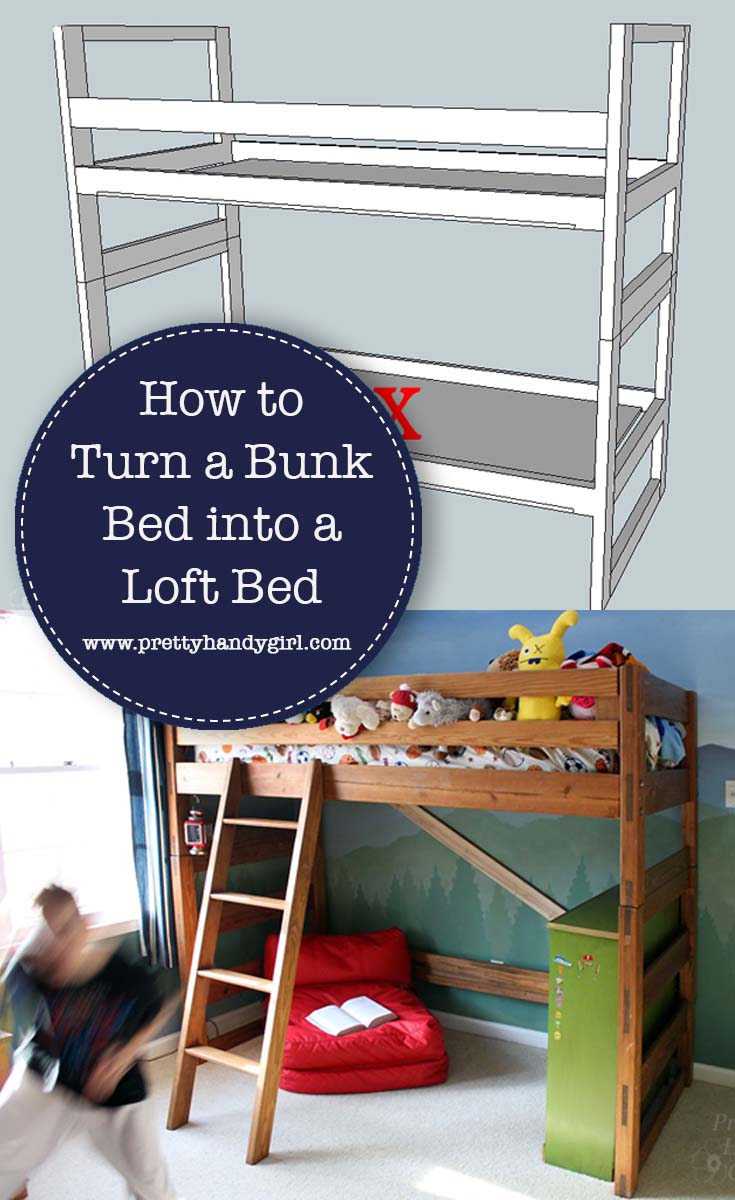
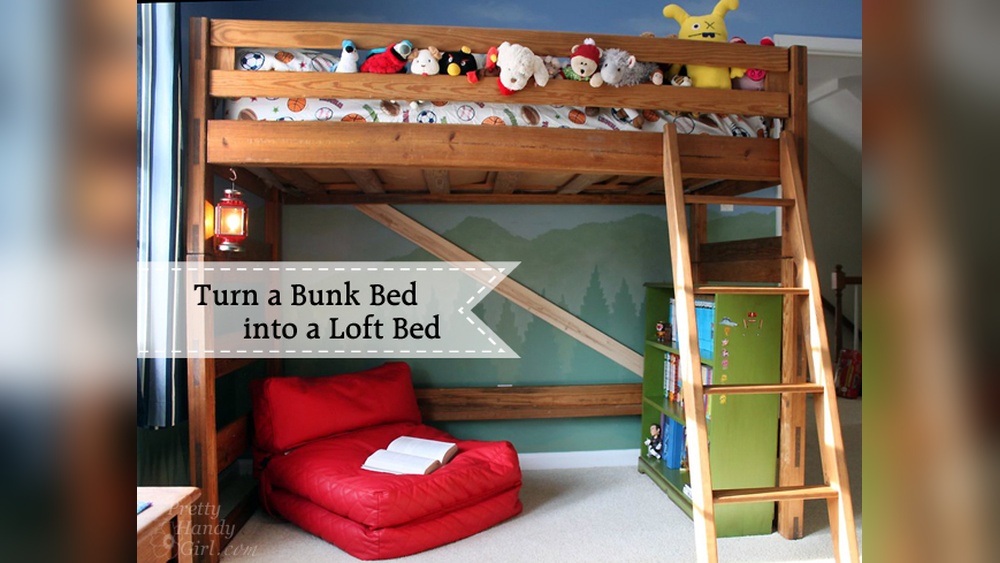
Credit: prettyhandygirl.com
Frequently Asked Questions
How Do I Safely Convert A Bunk Bed To A Loft Bed?
First, remove the lower bunk carefully. Ensure the upper bunk is securely attached to the frame. Use proper tools and follow manufacturer instructions to avoid accidents.
What Tools Are Needed To Convert A Bunk Bed To Loft Bed?
You typically need a screwdriver, wrench, and possibly a drill. Some conversions require bolts or brackets. Check your bed’s manual for specific tool requirements.
Can I Convert Any Bunk Bed Into A Loft Bed?
Not all bunk beds can be converted. Check the frame’s design and stability. Some beds are not built to support loft configurations safely.
How Much Space Is Needed For A Loft Bed Conversion?
Measure your room’s height and floor space. A loft bed requires enough clearance underneath for comfort and safety. Typically, 5 to 6 feet of vertical space is ideal.
Conclusion
Converting a bunk bed to a loft bed saves space and adds style. You only need a few tools and clear steps to follow. Safety checks are key to keep the bed secure. This small change can make a room feel bigger and more open.
Try it yourself and enjoy the extra room below the bed. It’s a simple project with big benefits.