Looking for a unique way to organize your coats and add a rustic touch to your space? Mounting deer antlers to make a coat rack is a creative project you can easily do yourself.
Imagine turning those impressive antlers into a stylish, functional piece that grabs attention every time someone enters the room. In this guide, you’ll discover simple steps and tips to transform antlers into a sturdy, eye-catching coat rack. Ready to make your walls both practical and beautiful?
Let’s dive in!
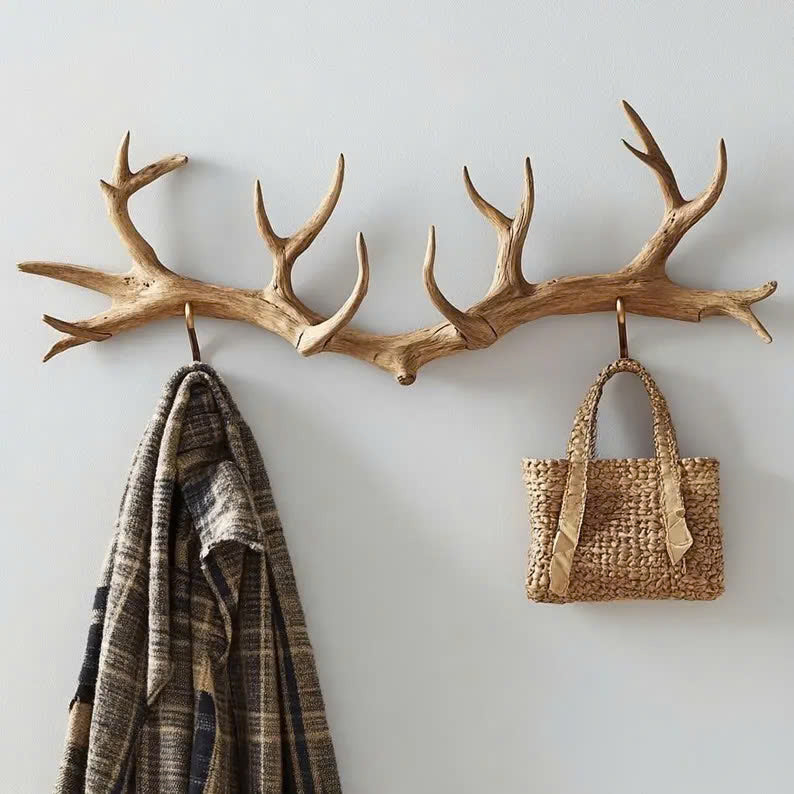
Credit: www.spryinterior.com
Materials Needed
Gathering the right materials is the first step to build a deer antler coat rack. Having everything ready makes the project smooth and fast. Each item plays a key role in making your rack strong and stylish.
Choose materials carefully for safety and durability. The list below covers all essentials for mounting deer antlers to a wall.
Deer Antlers
Select clean, sturdy antlers with a flat base for easy mounting. Avoid cracked or weak pieces that may break under weight.
Wooden Backing Board
Use a solid wood board to attach the antlers. The board should be thick enough to hold screws firmly.
Mounting Hardware
Gather screws, wall anchors, and brackets that fit your wall type. These secure the rack safely to the wall.
Drill And Drill Bits
A drill speeds up the process of making holes. Use bits matching the size of your screws and anchors.
Measuring Tape And Pencil
Measure twice and mark holes clearly. Accurate markings ensure the rack mounts evenly and looks good.
Sandpaper
Smooth rough edges on the wood and antlers. This prevents splinters and helps paint or stain stick well.
Wood Stain Or Paint (optional)
Choose stain or paint to match your decor. This step adds a finished look and protects the wood.
Protective Gear
Wear gloves and safety glasses. Protect your hands and eyes while drilling and sanding.
Choosing The Right Antlers
Choosing the right antlers is the first step in making a coat rack. The antlers need to be sturdy and have enough points to hang coats and hats. Size matters too. Too small antlers will not hold many items. Too large ones may take up too much space on your wall.
Natural antlers bring a rustic look. They add character and charm to any room. Synthetic antlers can work as well. They are lighter and easier to handle. Both types have their own benefits.
Consider The Size And Shape
Choose antlers that fit your space. Wide antlers offer more hanging spots. Curved shapes can hold items securely. Straight or narrow antlers may not be as useful. Think about how much room you have on your wall.
Check The Condition Of Antlers
Pick antlers without cracks or breaks. Strong antlers last longer and hold weight better. Avoid brittle or damaged pieces. Clean antlers enhance the look of your coat rack. A smooth surface is easier to mount.
Match The Style Of Your Room
Select antlers that match your home decor. Rustic rooms suit rough, natural antlers. Modern spaces may look better with polished or painted antlers. Color and texture affect the final look. Choose antlers that complement your style.
Preparing The Antlers
Preparing the antlers is an important step for a strong and attractive coat rack. Clean and shape the antlers well before mounting. This makes sure they look great and last longer. Proper preparation also helps the coat rack hold weight safely.
Cleaning And Treating
Start by washing the antlers with warm water and mild soap. Remove dirt and dust carefully. Use a soft brush to clean hard-to-reach spots. Rinse the antlers well and let them dry completely.
After drying, treat the antlers to keep them from cracking. Apply mineral oil or beeswax with a cloth. This protects and shines the surface. Let the oil soak in for a few hours before moving on.
Trimming And Shaping
Check the antlers for sharp or uneven parts. Use a saw or rotary tool to trim any unwanted points. Shape the antlers to fit your coat rack design. Smooth rough edges with sandpaper for safety and style.
Make sure the antlers have a flat base or area for mounting. This helps them attach securely to the wall or board. Proper shaping gives your coat rack a neat, finished look.

Credit: www.spec-school.org
Selecting A Mounting Board
Choosing the right mounting board is key to making a sturdy coat rack from deer antlers. The board holds the antlers and supports the weight of coats. It also sets the look and feel of your rack. Picking the right wood type, size, and shape will help your project last and look great.
Wood Types
Hardwoods like oak, maple, or walnut work best for mounting boards. They are strong and resist dents and scratches. Softwoods like pine are easier to cut but may not hold heavy coats well. Choose wood with a smooth surface to avoid splinters. A natural finish shows the wood grain and adds charm. You can also paint the board to match your room decor.
Size And Shape
The board must be big enough to hold the antlers firmly. Measure the width and height of the antlers before picking the board. A rectangular or oval shape works well for most racks. Avoid boards that are too thin or narrow, as they may bend or break. Thickness of at least 1 inch gives good support. The board’s size also affects how many coats you can hang safely.
Attaching The Antlers To The Board
Attaching the antlers to the board is a key step in making a sturdy coat rack. This process secures the antlers firmly and ensures the rack holds weight well. Careful preparation and precise work make the coat rack both functional and attractive.
Marking Drill Points
Start by placing the antlers on the board. Move them until the position looks balanced. Use a pencil to mark spots where screws will go. Mark near the base of each antler for strong support. Check that marks align on both sides for even mounting.
Drilling And Screwing
Use a drill with a bit slightly smaller than your screws. Drill holes carefully at the marked points. This prevents the wood from splitting. Next, hold the antlers in place and drive screws into the holes. Tighten screws until the antlers feel secure but avoid over-tightening.
Finishing Touches
Finishing touches bring your deer antler coat rack to life. They improve both look and function. Careful steps make the rack safe and stylish. Pay close attention to details for a polished result.
Sanding And Staining
Start by sanding the antlers and wood base. Use fine-grit sandpaper for a smooth surface. Remove any rough spots or splinters. Wipe off dust with a clean cloth.
Next, apply wood stain to enhance color and protect the wood. Choose a shade that fits your room’s style. Use a brush or cloth to spread stain evenly. Let it dry fully before moving on. Staining highlights natural patterns in the wood and antlers.
Adding Hooks Or Hardware
Hooks turn your antlers into a useful rack. Pick strong hooks that fit your style and needs. Screw hooks into sturdy parts of the antlers or wood base. Space hooks evenly for balanced hanging.
Use wall mounts or brackets to secure the rack. Make sure it can hold heavy coats safely. Test stability before hanging any items. Proper hardware makes the rack both functional and durable.
Mounting The Coat Rack On The Wall
Mounting the coat rack on the wall is the final step. This step makes sure the rack holds heavy coats safely. Proper mounting keeps the antlers steady and secure. It also adds a rustic charm to your room.
Choosing Location
Pick a spot that suits your daily routine. Near the door is best for easy access. Check the wall space for enough room. Avoid places with moisture or extreme heat. The rack needs a dry, stable area to last.
Securing To Wall Studs
Find the wall studs using a stud finder. Studs provide strong support for heavy racks. Mark the stud locations with a pencil. Use long screws to attach the rack to the studs. This prevents the rack from falling or loosening over time.

Credit: garinfobahn.com
Maintenance Tips
Maintaining deer antlers used as a coat rack helps keep them strong and attractive. Proper care prevents damage and dust buildup. It also extends the life of the mounted antlers. Follow these simple tips for easy maintenance.
Cleaning The Antlers
Use a soft cloth or brush to remove dust gently. Avoid harsh chemicals that can harm the antler’s surface. A damp cloth with mild soap works well for dirt. Dry the antlers thoroughly to prevent moisture damage.
Protecting Against Cracks
Keep the antlers away from direct sunlight and heat sources. Heat can cause the antlers to dry out and crack. Apply a light coat of mineral oil every few months. This keeps the antlers moisturized and flexible.
Checking The Mounting Hardware
Inspect screws and brackets regularly to ensure they stay tight. Loose hardware can cause the antlers to fall or become unstable. Replace any damaged parts immediately to maintain safety.
Preventing Pest Damage
Watch for signs of insects or pests on the antlers. Use natural repellents like cedar blocks nearby to keep bugs away. Clean the area around the rack often to reduce pest attraction.
Frequently Asked Questions
How Do You Prepare Deer Antlers For Mounting?
Clean the antlers thoroughly with mild soap and water. Remove any dirt or debris. Let them dry completely before mounting.
What Tools Are Needed To Mount Deer Antlers?
You need a drill, screws, wall anchors, a level, and a mounting board or plaque. Safety gear is recommended.
Can Deer Antlers Support Heavy Coats?
Yes, properly mounted deer antlers can hold multiple coats. Ensure secure wall anchors and sturdy screws for better support.
Where Is The Best Place To Mount Antler Coat Racks?
Mount in entryways or mudrooms for easy access. Choose a visible, sturdy wall that can support weight.
Conclusion
Mounting deer antlers to make a coat rack adds charm to any room. It is a simple project that anyone can try. With a few tools and steps, you create a unique and useful piece. This rack holds coats, hats, and bags neatly.
It also shows your love for nature and hunting. Try this project to bring a rustic touch into your home. Enjoy your new coat rack every day. It’s practical and beautiful at the same time.