Are you tired of looking at a plain, worn-out bookshelf that doesn’t match your style? Covering your bookshelf with contact paper is a simple and affordable way to give it a fresh, new look.
Imagine transforming your space in just a few easy steps, making your bookshelf a stunning focal point. In this guide, you’ll discover how to choose the right contact paper and apply it perfectly—no bubbles, no wrinkles. Keep reading, and you’ll learn how to upgrade your bookshelf with confidence and ease.
Your home deserves this quick makeover!

Credit: www.youtube.com
Choosing The Right Contact Paper
Choosing the right contact paper is the first step to a great bookshelf makeover. The right choice makes your shelf look neat and stylish. It also protects the surface from scratches and dust. Consider the type, design, and size before buying contact paper.
Material Types
Contact paper comes in vinyl, fabric, and paper types. Vinyl is waterproof and easy to clean. It works well for shelves that may get wet or dirty. Fabric contact paper gives a soft look but may not last long. Paper types are budget-friendly but less durable. Pick a material that fits your shelf use and room conditions.
Patterns And Colors
Choose patterns that match your room’s style. Simple colors like white or gray suit modern rooms. Bold patterns or bright colors add fun to plain shelves. Stripes, florals, or geometric shapes can create a unique look. Think about how the pattern will blend with other furniture.
Measuring Your Bookshelf
Measure the shelf’s length and width carefully. Add extra inches for wrapping edges smoothly. Measure each shelf if sizes differ. Accurate measuring avoids waste and mistakes. Use a tape measure and write down the numbers before cutting the paper.

Credit: craftylumberjacks.com
Preparing The Bookshelf
Preparing your bookshelf before applying contact paper is a key step. It helps the paper stick well and look smooth. A clean, smooth surface makes the final result neat and long-lasting.
Start by cleaning the bookshelf. Then, check for rough spots and sand them. Remove any old coverings that might stop the contact paper from sticking.
Cleaning The Surface
Remove dust and dirt from the bookshelf with a soft cloth. Use mild soap and water for sticky spots. Dry the surface completely before moving on. A clean surface helps the contact paper stick better.
Sanding And Smoothing
Look for rough areas or bumps on the wood. Use fine sandpaper to smooth these spots gently. Sanding creates an even surface for the paper. After sanding, wipe away any dust with a damp cloth.
Removing Old Coverings
Peel off old stickers, tape, or contact paper carefully. Use a scraper if needed, but avoid scratching the wood. Clean any leftover glue with rubbing alcohol. Removing old coverings prevents bumps and peeling later.
Cutting Contact Paper To Size
Cutting contact paper to the right size is important for a neat finish on your bookshelf. The paper must fit perfectly to avoid wrinkles or bubbles. Take your time to measure and cut carefully. The following steps help you get the perfect size for your project.
Measuring And Marking
Start by measuring the bookshelf surface accurately. Use a tape measure to get the width and height. Write down these numbers to avoid mistakes. Mark the contact paper using a pencil or light marker. Draw straight lines for easy cutting. Double-check your measurements before cutting.
Cutting Techniques
Use sharp scissors or a craft knife for clean edges. Cut slowly along the marked lines. Try to keep your hand steady. Avoid jagged or uneven cuts. Cut on a flat surface to maintain control. Keep the contact paper flat to prevent tears.
Handling Curves And Corners
Curves and corners need extra care. Cut small slits along curves to help the paper bend smoothly. For inside corners, trim the paper slightly to fit. Use your fingers to press the paper in place gently. Take your time to avoid wrinkles or folds. Smooth out bubbles as you go.
Applying Contact Paper
Applying contact paper to your bookshelf can change its look instantly. The key is to work carefully and patiently. Follow each step to avoid wrinkles and bubbles. This way, your bookshelf will look smooth and neat.
Peeling And Positioning
Start by peeling a small part of the backing paper. Align the contact paper with the edge of the shelf. Slowly stick the exposed part to the surface. Hold the paper taut but not stretched. Peel more backing paper as you press the contact paper down. Keep it straight to avoid crooked lines.
Smoothing Out Bubbles
Use a flat tool or your hand to smooth the paper. Move from the center toward the edges. This pushes out trapped air and removes bubbles. Work gently to avoid tearing the paper. Check for small bubbles and press them out carefully. Take your time for a clean finish.
Trimming Excess Edges
After covering the surface, trim extra paper with a sharp blade. Cut close to the edge of the shelf. Use a ruler to guide your cuts if needed. Trim slowly to avoid mistakes. Removing extra paper gives your shelf a neat, finished look. Dispose of scraps properly to keep your workspace clean.
Adding Finishing Touches
Adding finishing touches to your bookshelf covered with contact paper makes a big difference. It helps protect the paper and gives your shelf a polished look. Small steps in this stage keep your project looking fresh and neat for a long time.
Sealing Edges
Seal the edges of the contact paper with clear tape or a light layer of glue. This stops the paper from peeling or lifting over time. Press the edges down firmly and smooth out any bubbles. Sealing protects the corners where wear happens fastest.
Decorative Accents
Use decorative accents like washi tape or stickers to add style. Choose colors and patterns that match your room’s theme. These accents hide any small flaws and give your shelf a unique look. Keep decorations simple for a clean, fresh feel.
Maintaining The Surface
Clean the contact paper surface with a soft, damp cloth. Avoid harsh chemicals or rough scrubbing that can damage the paper. Regular dusting keeps your shelf looking good. Check edges often and reseal if needed to keep it neat.
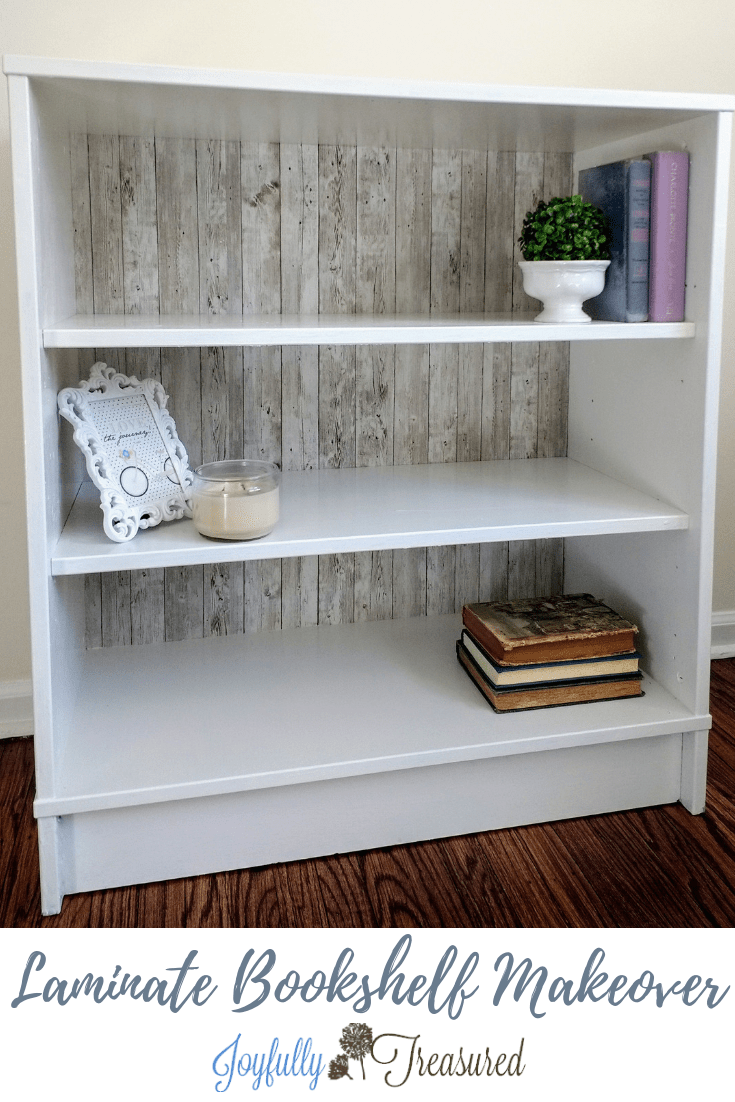
Credit: joyfullytreasured.com
Common Mistakes To Avoid
Covering a bookshelf with contact paper can refresh its look quickly. Avoiding common mistakes helps the paper stick well and look neat. These errors can cause frustration and waste materials. Knowing what to avoid makes the project easier and more fun.
Misalignment Issues
Placing the contact paper unevenly ruins the finished look. It may cause crooked edges and uneven patterns. Start by measuring the shelf carefully. Align the paper’s edge with the shelf edge before sticking. Slowly press down to keep it straight. Take time to adjust before pressing firmly.
Air Bubbles And Wrinkles
Trapped air makes bumps and wrinkles on the surface. These flaws catch the eye and look messy. Smooth the paper from the center outwards. Use a flat tool like a credit card or squeegee. Work gently to push out air pockets. Peel back slowly if bubbles form and try again.
Using The Wrong Adhesive
Not all contact papers have the same glue type. Some adhesives may not stick well to wood or painted surfaces. Pick contact paper designed for your shelf’s material. Avoid very strong glue on delicate finishes. Test a small corner before covering the whole shelf.
Creative Ideas For Bookshelf Makeovers
Bookshelf makeovers bring new life to old furniture. Contact paper is an easy way to refresh shelves. It offers many creative options for unique looks. Simple changes can make your bookshelf stand out. Choose styles that match your room and personality.
Explore different ideas to transform your bookshelf using contact paper. These creative tips help you make a stylish and personal design.
Mixing Patterns
Combine different patterns to create a fun look. Use stripes on the sides and florals on the shelves. Mix colors that work well together. This makes your bookshelf eye-catching and lively. Keep patterns balanced to avoid a busy feel. Use small amounts of bold patterns with simple ones.
Using Metallic Or Textured Paper
Choose metallic contact paper for a shiny, modern look. Gold, silver, or copper add a touch of elegance. Textured papers give a cozy, tactile feel. Options like faux wood or leather add depth. These styles make your bookshelf unique and stylish. They also hide scratches or marks well.
Seasonal And Themed Designs
Change your bookshelf design with the seasons. Use bright colors and floral prints for spring. Warm tones and leaf patterns fit autumn. Holiday themes add festive charm. This keeps your space fresh and exciting. Swap contact paper easily for each new look.
Frequently Asked Questions
How Do I Prepare A Bookshelf For Contact Paper?
Clean the bookshelf surface thoroughly to remove dust and dirt. Use a damp cloth and let it dry completely. Smooth surfaces work best for contact paper adhesion and durability.
Can Contact Paper Protect My Bookshelf From Damage?
Yes, contact paper adds a protective layer against scratches and stains. It helps preserve the bookshelf’s surface while enhancing its appearance.
What Tools Do I Need To Apply Contact Paper?
You need contact paper, a measuring tape, a utility knife, and a squeegee or credit card. These tools help achieve a smooth, bubble-free application.
How Do I Avoid Bubbles When Applying Contact Paper?
Peel the backing slowly and press the paper firmly from one edge. Use a squeegee or credit card to smooth out air bubbles as you go.
Conclusion
Covering a bookshelf with contact paper is simple and fun. It protects your shelves and gives them a fresh look. Take your time to measure and apply the paper carefully. Small bubbles can be smoothed out easily. Choose a design that fits your style and room.
This DIY project can change the feel of your space quickly. Try it yourself and enjoy the new look today.